OVERVIEW
ECO Feature is fully re-designed to better support the regulations and best practice
In this tutorial user will be able to manage a full ECO (Engineering Change Order) process, that includes the followings:
- Create an e-Forms project (or use any existing project)
- Activate ECO e-form
- Manage ECO form attributes
- Format the ECO template and styling for export and printing
- Setup e-sign
- Setup status flow
E-FORMS PROJECT
Create a project to manage ECO’s. See here how to create a new project in Orcanos
In this project create the folders structure for managing your ECO
Example:

ECO SETUP
ACTIVATE ECO FORM
- In order to activate ECO form, Selects Admin panel> Customization> Work Items
- Track the work item Change Request(User Description- Engineering Change Order), and make sure it is active (checked) in Show/Hide Column
- Change Request is the work item in which you will manage ECO
MANAGE ECO FORM ATTRIBUTES
Now you need to manage ECO attributes. To Manage ECO Form:
- Selects Admin panel> Customization> Fields Layout(eForm)
- Select the ECO work item
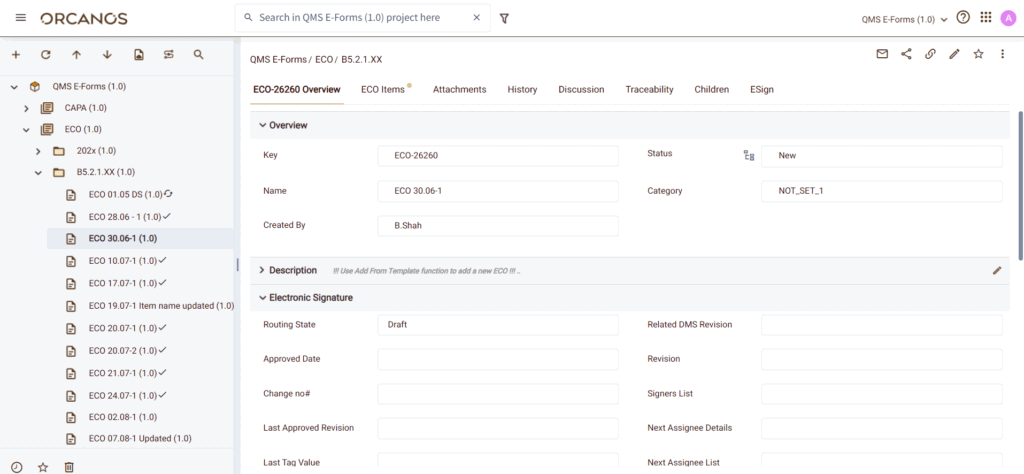
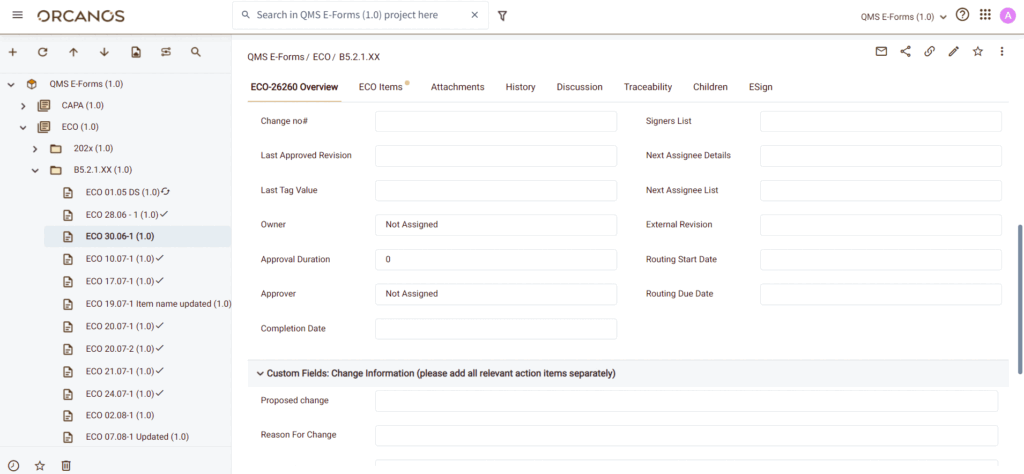
- Create new sections, add/remove fields by drag & drop (Fields Layout)
- To add new fields that don’t exist in the available fields in fields layout – go to the Custom fields management to create fields, and then open Fields Layout and add the new fields
Example partial ECO form:

ECO TEMPLATE AND STYLING
- Selects Admin> Projects & Solutions> Projects
- Open the e-Forms project and open the “Description Templates” tab on its detail page
- Select “Engineering Change Order” work item

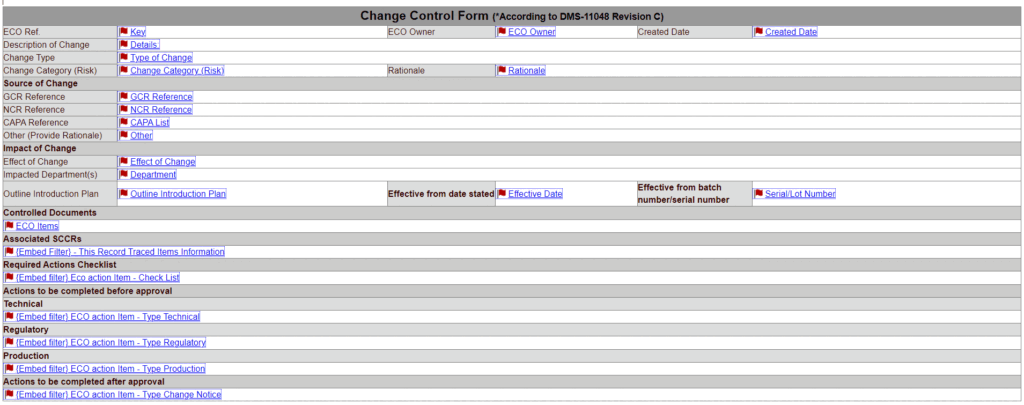
- Now build the form in the description template, the same way it is the layout in word (you can copy-paste from word) but it might require manual HTML styling work to make it look as you wish
- The trick here is to embed the e-form fields inside the ECO description, so when you print it – dynamic fields will be parsed to the ECO field value
- So each place you wish to put dynamic field – click the “Embed Field” button in the editor toolbar
BUILD ECO STATUS FLOW
- Selects Admin> Projects & Solutions> Projects
- Open the e-Forms project and open the “Process Flow” tab on its detail page
- Build status flow (see here how to customize status flow)
DEFINE ROUTING PROCESS
- Now build the e-sign process that is required in order to approve (by e-sign) the ECO
- Learn about e-sign, how to define the routing process, and how to attach e-sign to a specific status transition – click here
- Now you are all set
ECO PROCESS USE CASE
ADD NEW ECO
Open your project, and add new ECO item
Change ECO attributes
Add action items
You can add action items under the ECO as children
Add DMS items to ECO
Open the “ECO Items” tab

Click the Plus button in order to add the relevant DMS items to the ECO
The ECO cannot be signed until all related items are signed
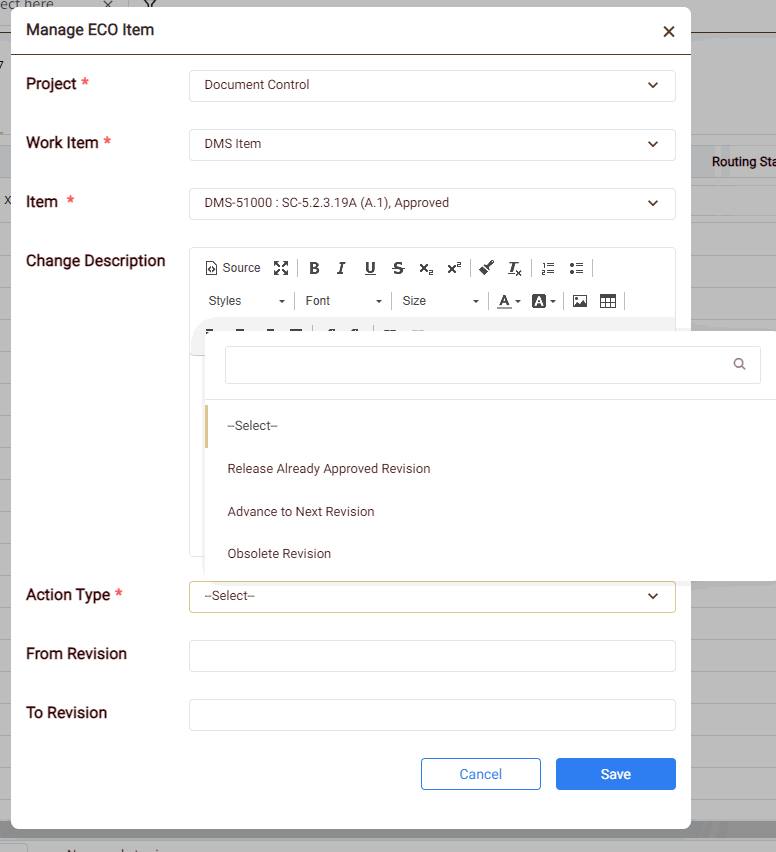
The following form opens

- Project – Select the project from which you wish to add items, in this example, we will open the document control (DMS) and select a document that needs to be changed due to this ECO
- Work Item – select the work item type (in our case its DMS Item)
- Item – search for a specific document, using document ID or document name
- Change description – HTML Editor where you can describe the change for the selected document
- Action Type – Add Revision First Time, Release Already Approved Revision, Advance to Next Revision and Obsolete Revision
- From Revision– the initial revision before the change
- To Revision – the document revision after the change is made and the document is electronically signed
- Click Save.
One DMS Item with different Revisions can be added under more than one ECO Item.
Approving ECO Related items
Start routing for the related DMS items, and sign the related DMS items
Approve ECO
- When a document is linked to an ECO, and the document is signed, the status is not becoming as Approved, but as Pending Approve.
- Only after the ECO is approved – then the related documents are released. And become Approved.
- Same for obsoleting a document via an ECO
- Change status according to the defined flow. In our case when the status is “Draft” – user needs to “Start Routing” in order to change the status to “Closed” (Pending Approve).
- Once e-sign is finished, ECO status changes to “Closed” – and this is the end of the process
- Once ECO is approved, you can see the ECO number (hyperlinked) and ECO Release date in the DMS item revisions history
