ABSTRACT
Orcanos FMEA Risk Management is ISO 14971 compliant and allows you to manage the complete process from hazard identification to risk mitigation. You can track risks, link them to mitigation and create a full traceability matrix. At the end – you can generate a risk management file to Word document, ready for submission.
ABOUT THIS TUTORIAL
This tutorial will assist you in the following:
- Setup your risk management profile, according to your SOP
- Build Risk Management File
- Understand Risk e-Form
- Trace risk to software and mechanical requirements for mitigation
- Verify mitigation
- Create filters and dashboards
- Generate risk management file ready for submission
BEFORE YOU START
Before starting, it is recommended that you follow the Orcanos Quick Walk-through in order to learn the basics, and how to build document, add headings hierarchically, and add risk work items in the hierarchical document.
Setup your FMEA rules
Orcanos allows you to configure the risk management according to your SOP. In order to configure your risk management, follow this article: FMEA Settings
Configure Risk form
In case you wish to add/remove fields from risk e-Form, add tooltip to fields or add sections, you can do it using the Fields Layout section in Admin
Configure Risk status flow
In order to change your project status flow for risk, go to your project and select Process Flow tab
BUILD RISK MANAGEMENT FILE
- Select the Project node from the Choose Project selection list
- Add a new Document
- Select the new created Document and add a new Paragraph underneath
- Select the newly created Paragraph and add new Risk
RISK e-FORM
Each risk has the following default tabs:
Overview
Contains the attribute (can be fully customized):
- Name – short description of risk
- Status – risk status flow. an example for risk workflow can be as such:
To see the risk status flow – click on the status flow viewer button, next to the status:
- Condition – List of Single Fault, Incorrect Use, Normal Use
- Assign To – Assignee
- Category – list of categories according to the ISO 14971, such as Radiation, Intended Use, Biochemical, Electrical
- Affected – Patient, Doctor, Operator, Environmental, Bystander, Service Personnel…
- Control Type – which control is required (Labelling, By Design, Protective Measure, Training…)
- Applicable Component – Related component
Attachments Tab
You can add relevant attachments, as evidence documents, etc
History Tab
Shows audit trail of risk history log
Discussion Tab
Manage team discussion over the risk item
Traceability Tab
Contains related items. Can be used for the followings:
- Link risk to requirements for mitigation (see below)
- Link risk to Complaint
- Any other relations
RISK TRACEABILITY FOR MITIGATION
Use the Traceability tab in order to manage relations to other work items.
You can add links from risk, or from mitigation items.
In case mitigation (requirement) exists:
- Select Risk item in your document
- Select Traceability Tab
- Click on the Add button (red button at the bottom right)
- Select the project from which you want to add the mitigation
- Select Work item (such as software requirement, hardware requirement)
- Select predefined filter (how to filters)
- Select link type “Risk Mitigation“
- Source/Target – Important! Make risk as Target, so it would appear in Orcanos Full Traceability Matrix
- Select risk/s from the list and click Save/ Save & Exist Button
In case mitigation doesn’t exist
Let’s assume we want to add a new software requirement for mitigation.
So, open the relevant project where the software requirements document is managed
- Add new Requirement
- Select Requirement Traceability tab
- Click on the Add button (red button at the bottom right)
- Select the project where risk exists
- Select Risk work item
- Select predefined filter (how to filters)
- Select link type “Risk Mitigation“
- Source/Target – Important! Make risk as Target, so it would appear in Orcanos Full Traceability Matrix
- Select requirement/s from the list and click Save/ Save & Exist Button
Now traceability is created.
MITIGATION VERIFICATION – LINK TEST TO REQUIREMENT
Now, we need to verify the mitigation. We will do it using Orcanos test management
You need to create a traceability between test case and the risk mitigation item (software requirement)
For your practice – use the Tracing Mode in Tree View in order to create this link
MITIGATION VERIFICATION – RUN TEST
Use the execution set in order to build QA plan, and run the test which is related to the risk item.
TRACKING RISK – DASHBOARD
There are several useful reports that allows you to track your risks
Add default panel and create the following panels:
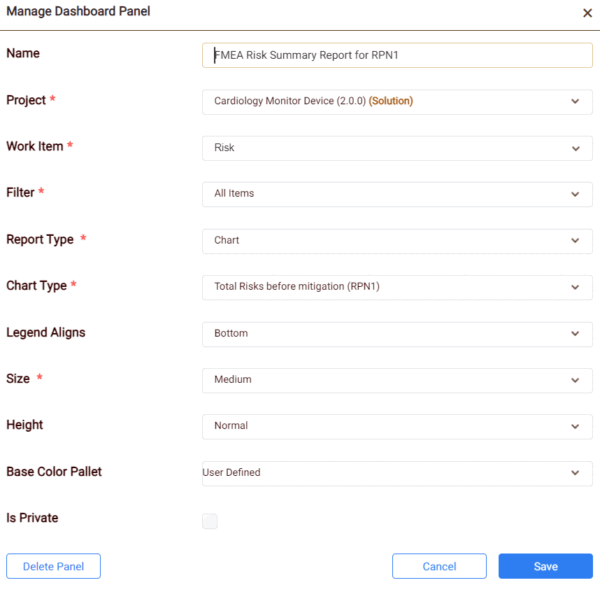
Risk Before Mitigation panel, and Risk After Mitigation panel


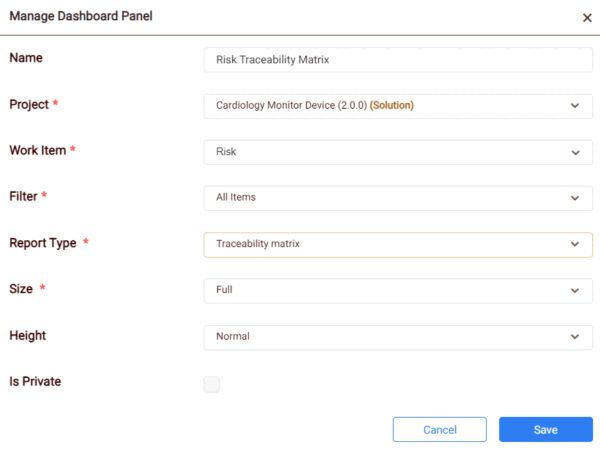
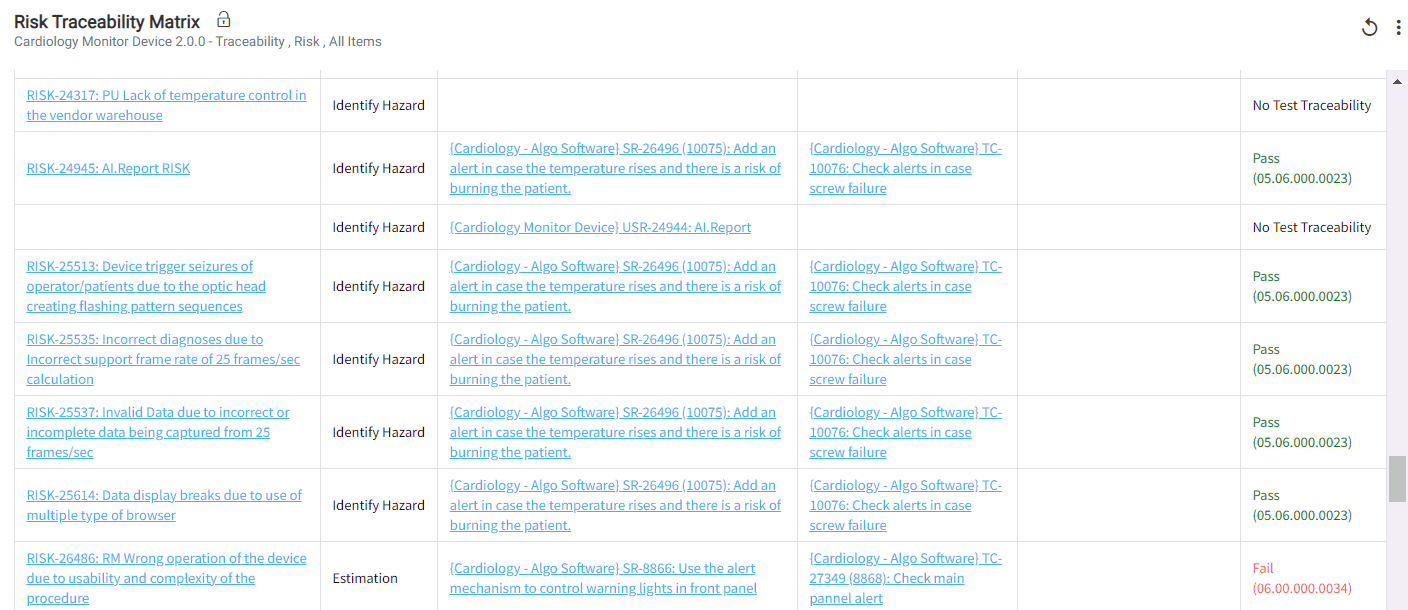
Risk Full Traceability Matrix


DOCUMENT GENERATOR – GENERATE RISK MANAGEMENT FILE
So, now you can generate the risk file. We are using “Export to Word Document” for that, along with dynamic filters. Click here to learn how to generate risk management file.