OVERVIEW
This article describes the steps required to setup SAML2 authentication on Orcanos server
You can use SAML only or SAML and Orcanos authentication
PREREQUISITES
- SSL must be setup in Orcanos server
- Make sure that AD users exist as Orcanos users, matching at least email or user name
SAML2 steps
- Select the System Settings from System Configuration in Admin
- Select SAML in the Authentication Method Type
- Force SSO – When ‘Force SSO’ is checked, the only method for logging in and signing is via Single Sign-On (SSO).
- Open the web folder (the path is ~\qpackweb_new)
- Put the IDP.cer (certificate files) in the IIS Orcanos root account. The customer will provide these files (This step will be performed by Orcanos).
- Orcanos will put the file sp.pfx
- The customer might need to get the sp.pfx file from Orcanos
- Open the SAML.config and set the return URL – the request that will return after the SAML authentication (will be performed by Orcanos, usually not change):
- Set the SingleSignOnServiceUrl and SingleLogoutServiceUrl in the SAML.config. Customer will provide these URLs or can get from the metadata.xml.
- The Customer needs to send the email or user name in the NameID in the SAML response
<saml:NameID Format=”urn:oasis:names:tc:SAML:1.1:nameid-format:unspecified”> [email protected]</saml:NameID> - If Customer’s ADFS settings support the SingleLogoutServiceUrl (SLO) call back, then customer have to set the Orcnaos URL in the SLO call back. URL would be like CustomerBaseURL/web/SAML/SLOService for example: https://app.orcanos.com/CustomerName/web/SAML/SLOService
The file name can vary. So if file name is different – update the saml.config
<SAMLConfiguration xmlns=”urn:componentspace:SAML:2.0:configuration”>
<ServiceProvider Name=”https://saml.orcanos.com/”
AssertionConsumerServiceUrl=”~/SAML/AssertionConsumerService“
CertificateFile=”sp.pfx”
CertificatePassword=”password”/>

Now lets setup partner identity information (provided by the customer)
<!– MVC example –>
<PartnerIdentityProvider Name=”https://PARTNER/nidp/saml2/metadata”
SignAuthnRequest=”false”
WantSAMLResponseSigned=”false”
WantAssertionSigned=”false”
WantAssertionEncrypted=”false”
SingleSignOnServiceUrl=”https://PARTNER/nidp/app”
SingleLogoutServiceUrl=”https://PARTNER.com/nidp/app”
CertificateFile=”idp.cer”/>
If the customer provides Orcanos with the Metadata file, which acts as an Identity Provider, we can configure the above process ourselves
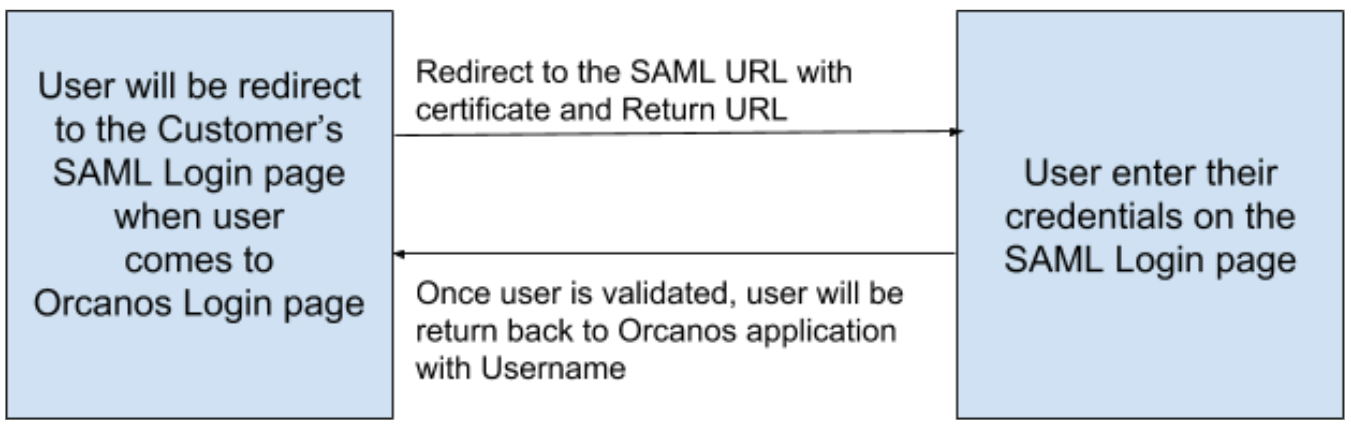
HOW THE SAML AUTHENTICATION WORKS
When the user opens Orcanos Login page, the user is redirected to the configured URL (a SAML log in page). When User enters credentials, it will be validated on customer AD server with SAML protocol.
Once user credentials validate successfully, the user will be redirected to the Orcanos site with a username (email or Orcanos username) in the response. We will use that username to login users in our system.
User must exist both in Orcanos and Active Directory